Installing vinyl sheet flooring on a wood subfloor can be a seamless transformation that significantly enhances the aesthetics of your space. This do-it-yourself project is not only cost-effective but also an efficient way to revive your floors by adding a touch of modernity and elegance.
This guide will walk you through the process of how to install vinyl sheet flooring on a wood subfloor, ensuring you achieve a professional finish without incurring the cost of hiring a professional.
Whether you’re a renovation enthusiast or a beginner, our step-by-step guide will make the process smooth and manageable.
The correct installation of vinyl sheet flooring on a wood subfloor is paramount in achieving a durable and aesthetically pleasing result. When adequately installed, vinyl flooring can last for years, maintaining its shine and texture, and contributing significantly to your interior decor.
On the other hand, improper installation can lead to issues such as bubbling, peeling corners, and visible seams, which not only mar the look of the floor but also necessitate premature replacement.
Furthermore, a well-installed vinyl floor provides a smooth and safe surface for traffic, while a poorly installed one can create tripping hazards. Therefore, the importance of correct installation cannot be overstated for the longevity, safety, and visual appeal of your vinyl sheet flooring.
1. Preparing the Subfloor

Checking the Condition of the Wood Subfloor
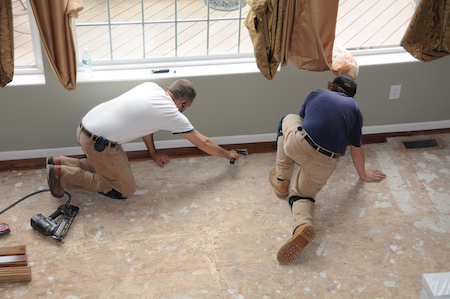
Before you embark on the installation of vinyl sheet flooring, a thorough inspection of the wood subfloor is essential. Start by ensuring the subfloor is clean, dry, and level. Use a straight edge or a level to check for any dips or rises.
These irregularities can impact the outcome of your installation, leading to uneven flooring or causing the vinyl to crack or tear over time.
Next, ensure the subfloor is structurally sound. Look for signs of rot or damage such as cracks, loose boards, or protruding nails. Pay special attention to areas where there might be water damage, as these could compromise the integrity of the new flooring.
If you spot any damage, it’s crucial to repair or replace the affected sections before proceeding with the installation.
It’s also important to check the moisture content of the wood subfloor. Too much moisture can cause the vinyl to warp or become unglued. Use a moisture meter to check the moisture levels and make sure they’re within the acceptable range for vinyl flooring.
Lastly, the wood subfloor should be smooth. Any texture or roughness on the subfloor can show through the vinyl, resulting in a bumpy and uneven appearance. Sand down any high spots and fill in low spots with a leveling compound to ensure a smooth and even surface for the vinyl to adhere to.
Cleaning and Leveling the Subfloor
Before you proceed with the installation of your vinyl sheet flooring, it’s crucial to clean and level the subfloor adequately. Start with a thorough sweep to remove any debris, dust, or loose particles.
For more stubborn dirt or stains, use a mild cleaning solution and a stiff-bristled broom, followed by a thorough rinse with clean water.
Allow the subfloor to dry completely before proceeding; any residual moisture can interfere with the vinyl’s adhesion and may lead to future issues such as warping or peeling.
Once cleaned, the leveling process begins. Use a long, straight 2×4 and a carpenter’s level to identify any high or low areas in the subfloor.
High points can be sanded down using a belt sander or hand planer, while low spots should be filled with a suitable floor-leveling compound.
This compound should be mixed as per the manufacturer’s instructions and applied smoothly with a trowel, filling the low spots to the level of the surrounding area.
After it’s applied, allow the leveling compound to dry fully according to the product’s guidance before moving on to the next step. A correctly cleaned and leveled subfloor provides a perfect foundation for your vinyl sheet flooring, leading to a better finish and a longer-lasting floor.
2. Choosing the Right Vinyl Sheet Flooring
The selection of the right vinyl sheet flooring can make a significant difference in the aesthetic and functionality of your space.
There are primarily three types of vinyl sheet flooring: homogeneous, heterogeneous, and inlaid. Homogeneous vinyl is a single-layered flooring that offers vibrancy in color and is highly durable, making it ideal for high-traffic areas such as commercial spaces.
Heterogeneous vinyl, on the other hand, consists of multiple layers, offering a wide range of patterns and designs suitable for residential and low-traffic areas.
Inlaid vinyl is a premium option where color granules are embedded into the vinyl sheet for a rich visual depth.
When choosing the right vinyl flooring for your needs, consider these factors.
Durability is crucial, especially for high-traffic areas. Higher quality vinyl will withstand wear and tear better.
Design and color should complement the room’s décor and style. Remember, lighter colors can make a room seem more spacious, while darker tones provide warmth.
Finally, consider the maintenance. Vinyl floors are generally easy to care for, but some may require periodic sealing or waxing. It’s essential to select a flooring type that fits your maintenance preference and lifestyle.
3. Necessary Tools and Materials
Here’s a list of the necessary tools and materials required for the installation of vinyl sheet flooring:
Tape Measure: This is used to take accurate measurements of the room to ensure you cut the vinyl sheet to the correct size.
Utility Knife: A utility knife is used to cut the vinyl sheet flooring. It’s important to have a sharp blade for clean cuts.
Straight Edge: A straight edge is used in conjunction with the utility knife to make straight cuts on the vinyl sheet.
Notched Trowel: This tool is used to spread the adhesive evenly on the subfloor before laying the vinyl sheet.
Roller: A roller is used to firmly press the vinyl sheet into the adhesive to ensure a strong bond.
Vinyl Adhesive: This is the material that secures the vinyl sheet to the subfloor. Ensure to choose an adhesive compatible with your vinyl flooring.
Vinyl Sheet Flooring: The vinyl sheet flooring of your choice. Ensure you’ve measured your space correctly so that you have enough material to cover the entire area, including a little extra for waste and mistakes.
4. Step-by-Step Installation Guide

Measuring and Cutting the Vinyl Sheet
The first step in the installation process is to measure the room accurately. Using the tape measure, calculate the width and length of the room. Always remember to add a few extra inches for allowances; this will account for any errors in cutting or slight discrepancies in room dimensions.
Typically, an additional 3 inches on all sides works well.
Once you have your room measurements, it’s time to cut the vinyl sheet. Unroll the vinyl sheeting on a large, flat surface, such as your driveway or garage floor.
Make sure the surface is clean to avoid damaging the vinyl. Then, using your tape measure and a straight edge, mark the cut lines on the vinyl sheet according to your room measurements plus the extra allowance.
Ensure your marks are straight and clear. Your utility knife will follow these lines, so precision at this stage ensures a perfect fit in your room. Once you’re satisfied with the marked lines, you can start cutting.
Place your straight edge along the marked lines. This will guide your utility knife and help maintain a straight cut. When cutting, apply steady pressure to the utility knife and make a firm, smooth cut along the entire length.
Remember, it’s better to err on the side of too long than too short. You can always trim an excess later, but you can’t add length once it’s cut.
Once you have your vinyl sheet cut, check it for fit in the room. It should cover the entire floor, with the extra allowance climbing up the wall slightly. If you need to trim any excess, mark the area with a pencil, then remove the vinyl and trim it accordingly.
Applying adhesive
Once your vinyl sheet is perfectly cut and fits your room correctly, the next step is to apply the adhesive. To begin, ensure that the room’s floor is completely clean and free from dust or debris.
Next, roll up one-half of the vinyl sheet to expose the floor. Starting from the corner, apply the adhesive to the floor using a trowel. Ensure you spread it evenly across the surface without leaving any gaps.
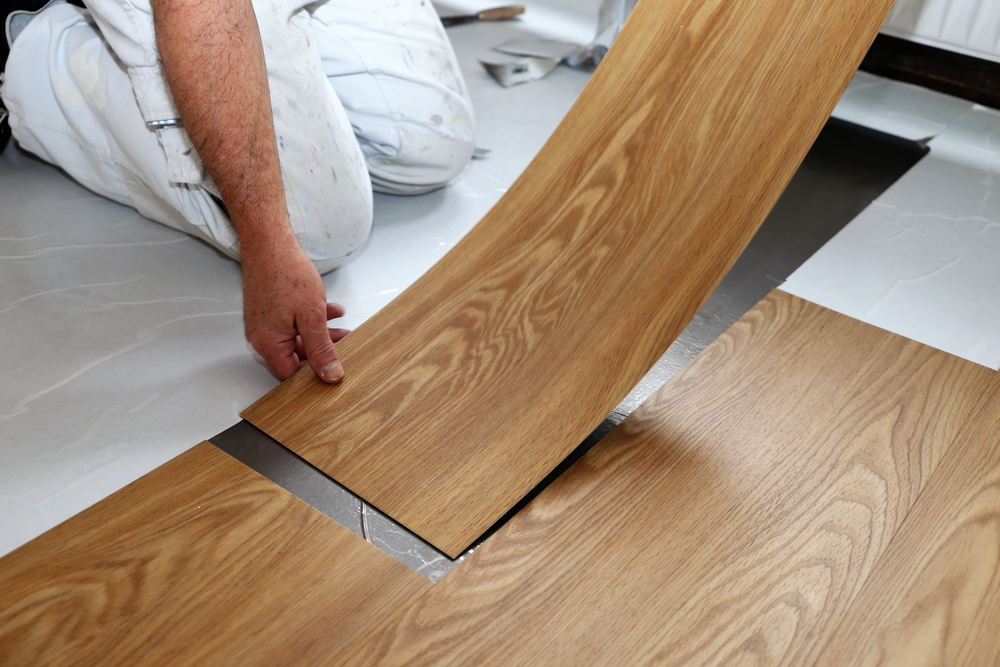
Once the adhesive is applied, carefully unroll the vinyl sheet back onto the floor, pressing down firmly to ensure it adheres to the surface. Repeat the process for the other half of the room.
After laying the vinyl sheet, use a roller to strengthen the bond between the sheet and the floor and remove any air bubbles. Remember to allow the adhesive to dry fully before you start using the room.
Placing and securing the vinyl sheet
Once the adhesive is completely dry, it’s time to place and secure the vinyl sheet. Begin by aligning the vinyl sheet precisely with the edges of the room. Confirm that the material is smooth and free of bumps or air pockets – these can compromise both the appearance and the durability of your flooring.
To secure the vinyl, you’ll need to apply a vinyl floor seam sealer along the edges of the sheet. This will prevent moisture and dirt from getting underneath the vinyl, which can lead to curling or damage over time.
Use a small brush or the applicator provided to spread the sealer along all edges of the vinyl sheet.
As you work, make sure you’re pressing the vinyl firmly into the adhesive beneath to ensure a strong bond. When the sealer is dry, your new vinyl floor is complete and ready for use.
Cutting and Fitting Trim Pieces
Once your vinyl floor is properly installed and sealed, the final step is to cut and fit trim pieces around the edges of the room. These pieces not only enhance the overall appearance of the floor but also protect the edges of the vinyl from wear and tear.
Begin by measuring the length of each wall where you’ll be installing the trim. After taking accurate measurements, use a saw to cut the trim pieces to the correct length.
Always remember to cut slightly more than the measured length to accommodate any discrepancies. When cutting corners, use a miter saw to ensure precise angles. Next, position each trim piece at the edge of the vinyl, ensuring it fits snugly and covers the edge of the vinyl sheet.
Attach the trim pieces using a suitable adhesive or small finishing nails, making sure they are secure and flush against the wall.
Related Topics:
5. Tips for a Seamless Transformation
Navigating Tricky Areas: Corners and Doorways
Adhering vinyl flooring around corners and doorways can present a unique set of challenges, but with the right approach, these tasks can be completed with precision.
When dealing with corners, it’s vital to measure accurately to ensure the vinyl fits snugly. Remember to factor in extra material to cover any discrepancies or unexpected obstacles common in corner areas.
To maneuver vinyl flooring into tricky corners, you may need to make relief cuts in the material. These small cuts provide the flexibility needed for the vinyl to bend and fit the corner without buckling or creasing.
Doorways also require special attention during vinyl flooring installation. For a seamless transition across doorways, the vinyl should be cut to match the shape of the door frame.
It can be helpful to create a template using cardboard or paper. This template should cover the whole floor area under the door’s swing, including the doorframe’s sides and the threshold.
After making the template, lay it over your vinyl and cut accordingly. Once cut, the vinyl can be laid and adhered to the floor with adhesive, ensuring a smooth and professional finish across the entire room.
Aftercare and Maintenance
Caring for your new vinyl sheet flooring is key to ensuring its longevity and preserving its aesthetic appeal. Here are some best practices for cleaning and maintaining your vinyl flooring:
Regular Sweeping: Regularly sweep your vinyl sheet flooring to remove loose dirt and grime, as these can be abrasive and potentially cause scratches on the surface.
Use Gentle Cleaning Solutions: When washing your floor, opt for a mild cleaning solution. Avoid harsh cleaners that can strip the wear layer or cause discoloration. A simple solution of warm water and mild dish soap often works well.
Avoid Excessive Water: While vinyl is water-resistant, excessive water can seep through the seams and edges and damage the adhesive or wood subfloor beneath. Always mop up spills promptly and never allow water to stand on the floor.
Use Soft Bristle Brushes: If you have stubborn stains, use a soft bristle brush to scrub. This will allow you to remove stains without scratching the floor.
Use Furniture Pads: Protect your vinyl flooring from scratches and dents by placing felt or rubber pads under furniture legs.
Regular Polishing: Consider applying a suitable polish every 6-12 months to keep your vinyl sheet flooring looking its best. Make sure to check with your flooring manufacturer for any recommended products.
Avoid Rubber: Avoid using rubber-backed mats or rugs as they can stain vinyl flooring. Instead, opt for non-staining mats or rugs.
Conclusion
Installing vinyl sheet flooring on a wood subfloor can indeed be a seamless transformation, enhancing the aesthetics of your interior space without breaking the bank.
This comprehensive guide has walked you through the entire process, from preparing the subfloor to choosing the right vinyl sheet flooring, and finally to the installation itself. Careful attention to each step ensures a professional finish that rivals the work of a hired expert.
The importance of correctly installing vinyl sheet flooring cannot be overstated – a well-done installation leads to a durable, visually appealing floor that can withstand years of use.
Conversely, a poorly executed installation can result in unsightly and potentially hazardous issues like bubbling, peeling corners, and visible seams.
Therefore, make the effort to thoroughly follow this guide and achieve a successful, satisfying transformation of your space. And remember, the job doesn’t end at installation – ongoing care and maintenance are key to enjoying your new floor for years to come.
FAQs
Can I install vinyl sheet flooring over any type of subfloor?
No, it is not recommended to install vinyl sheet flooring over any type of subfloor. The subfloor should be clean, flat, and dry. If you’re installing over a concrete subfloor, it should be cured and free of cracks. For wooden subfloors, any loose boards should be nailed down and any gaps filled in to provide a smooth surface. Always ensure that the subfloor is in optimal condition for the best installation results.
How often should I polish my vinyl sheet flooring?
For the best results and maintenance of your vinyl sheet flooring, it’s advisable to apply a suitable polish every 6-12 months. However, it’s important to check with your flooring manufacturer for any recommended products to ensure they’re suitable for your specific flooring. Regular polishing helps to keep your floor looking its best and extends its lifespan.


1 thought on “How To Install Vinyl Sheet Flooring On Wood Subfloor: Seamless Transformation”