Transforming your space with a fresh and stylish flooring upgrade doesn’t always mean saying goodbye to your existing carpet. Installing vinyl sheet flooring over carpet is a savvy and innovative solution that can breathe new life into your room without the need for a time-consuming and costly removal process.
This step-by-step guide will walk you through the seamless process of installing vinyl sheet flooring over carpet, providing you with the knowledge and confidence to achieve a beautiful and durable result.
Whether you’re looking to update your home’s aesthetic or seeking a temporary flooring solution, this method allows you to enjoy the benefits of vinyl without bidding farewell to your cozy carpet foundation.
Let’s embark on this flooring adventure together and transform your space with ease.
Installing vinyl sheet flooring over carpet has several advantages that homeowners should consider. Firstly, it provides a quick and cost-effective flooring update, eliminating the need for carpet removal.
This reduces both the labor costs and the time involved in changing your floors. Secondly, the existing carpet acts as an extra layer of insulation and soundproofing, enhancing the comfort and tranquility of your home.
Moreover, vinyl is a highly durable material resistant to spills, scratches, and daily wear, making it a practical choice for high-traffic areas.
Pre-Installation Preparation
Before embarking on the task of installing vinyl sheet flooring over carpet, it’s critical to thoroughly prepare.
Assessing the Condition of the Existing Carpet

Checking for Damage or Uneven Surfaces: Begin by examining your existing carpet for signs of damage, such as severe stains, tears, or burns, that might affect the vinyl’s appearance or adherence.
Also, pay close attention to the carpet’s surface. It must be even with no significant bumps or depressions, as these imperfections can translate through the vinyl flooring.
Cleaning and Vacuuming the Carpet Thoroughly: After the initial assessment, clean the carpet meticulously using a vacuum cleaner. Ensure that all dust, dirt, and small debris are removed, as these can prevent the vinyl from adhering properly to the carpet surface.
Gathering the Necessary Tools and Materials
To install vinyl sheet flooring over the carpet, you will need the following tools and materials:
Vinyl Sheet Flooring: Choose a style and design that suits your decor. Ensure you have enough to cover all the intended spaces, factoring in a little extra for mistakes and future repairs.
Adhesive or Double-Sided Tape: These will secure the vinyl flooring to the carpet. The choice depends on your preference and the type of vinyl flooring you have chosen.
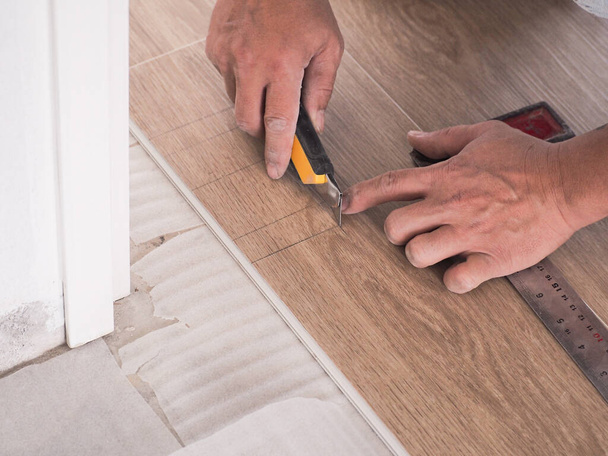
Utility Knife: A sharp utility knife will help you trim and cut the vinyl flooring to fit your room accurately.
Measuring Tape: You’ll need this to measure your room and the vinyl flooring correctly.
Straightedge or Ruler: This tool assists in making precise, straight cuts on your vinyl flooring.
Rolling Pin or Flooring Roller: These tools are used to press the vinyl sheet into place, ensuring it adheres properly to the carpet.
Safety Equipment: Lastly, don’t forget your safety equipment. Gloves will protect your hands during the cutting process, and knee pads will ensure comfort while you install the flooring.
Measurement and Cutting

Measuring the Room Dimensions Accurately
Begin by measuring the dimensions of the room where you’re installing the vinyl sheet flooring over the carpet. Use a measuring tape to get the length and width of the room. Multiply these to get the total square footage.
Ensure that you take into account any irregularities or obstacles such as cabinets, pillars, or fireplaces in the room, as these can affect the measurements and the amount of vinyl flooring needed.
Rolling Out the Vinyl Sheet Flooring Over the Carpet
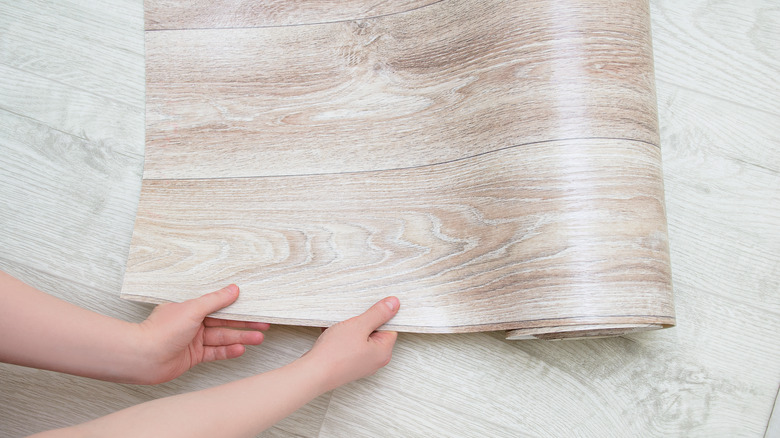
Unroll the vinyl sheet flooring onto the carpet. Ensure that the vinyl covers the entire carpeted area, extending a few inches up the walls. This will help you account for any measurement errors and provide a neat finish.
Marking and Cutting the Vinyl to Fit the Room Dimensions
Using a Straightedge or Ruler for Precise Cuts: With the vinyl sheet flooring in place, use a pencil to mark the areas that need to be cut. A straightedge or ruler will help you draw straight lines for accurate cuts. Make sure to mark the vinyl for each wall separately to consider any irregularities in the room.
Ensuring a Slight Overlap Against the Walls for a Neat Finish: Cut along the marked lines with a sharp utility knife. It’s essential to maintain a slight overlap against the walls to ensure a neat finish. This overlap can be trimmed later, after the vinyl has been secured, to fit perfectly against the walls.
Securing the Vinyl Over the Carpet

Applying Adhesive or Double-Sided Tape Along the Edges and Seams
Apply a flooring adhesive or double-sided tape along the edges and seams of the vinyl. The adhesive should be applied evenly, ensuring it covers the entire perimeter of the vinyl. This step is crucial as it helps secure the vinyl to the carpet, preventing it from shifting or curling over time.
Carefully Placing the Vinyl Sheet Onto the Carpet, Ensuring Proper Alignment
Once the adhesive is in place, carefully roll out the vinyl sheet onto the carpet. Ensure that the vinyl is aligned correctly with the walls and any obstacles in the room. Remember to align the seams of the vinyl with those of the carpet to prevent visible bumps or ridges.
Smoothly Pressing Down the Vinyl to Remove Air Bubbles
Smoothly press down the vinyl sheet to remove any air bubbles. Starting from the center and moving towards the edges will help push out any trapped air, preventing future buckling or warping of the vinyl. Use a squeegee or a smoother to apply even pressure across the vinyl.
Using a Rolling Pin or Flooring Roller to Secure the Vinyl Firmly to the Carpet
Finally, use a rolling pin or a flooring roller to secure the vinyl firmly to the carpet. The roller’s weight helps bond the vinyl to the carpet and the adhesive, ensuring a smooth and flat finish. Roll in different directions to ensure all areas of the vinyl are adhered properly.
Take special care around the edges and seams, where the vinyl is most likely to lift or curl.
Trimming and Finishing Touches
Trimming Excess Vinyl Along the Edges for a Clean Look
After securing the vinyl, use a sharp utility knife to trim any excess vinyl along the edges. Hold the knife at a slight angle and make a clean cut along the wall or baseboard. Be sure to make smooth, long cuts for a neat and professional look.
Ensuring Tight Seams and Corners
For tight seams and corners, use a seam roller to secure the vinyl firmly to the carpet. Roll the seam roller along the edges and into the corners of the room, applying even pressure to ensure a firm bond.
If necessary, use the utility knife to make minor adjustments to the vinyl’s fit in the corners.
Inspecting the Entire Installation for Any Imperfections
Once the trimming is completed, inspect the entire installation for any imperfections. Look for any bubbles, wrinkles, or loose edges that may need correction. Use the squeegee or smoother to iron out any wrinkles or air bubbles. Loose edges can be fixed by applying additional adhesive and pressing down firmly.
Allowing the Adhesive to Set According to Manufacturer Recommendations
Lastly, let the adhesive set before placing any furniture on the vinyl sheet. The setting time may vary according to the manufacturer’s recommendations, but typically it is best to wait at least 24 hours.
This allows the adhesive to fully bond the vinyl sheet to the carpet, ensuring a sturdy, long-lasting installation.
Maintenance and Care
Tips on Cleaning and Maintaining Vinyl Sheet Flooring Over Carpet
Regular cleaning is crucial in maintaining the appearance and extending the lifespan of your vinyl flooring. Avoid abrasive cleaners and heavy-duty scrub brushes as they can damage the surface. Instead, use a soft broom or vacuum to remove dust and debris.
For a deeper clean, use a damp mop with a mild cleaning solution. Always make sure to dry the floor after mopping to prevent water penetration and possible damage to the adhesive.
Addressing Potential Issues and Offering Solutions
As with any flooring, vinyl sheet flooring over carpet can present some issues over time, such as loosening of edges, bubbles, or wrinkles. Regular inspection can help identify and rectify these problems early.
Loose edges can be fixed by reapplying adhesive and pressing down firmly. For stubborn bubbles or wrinkles, a small cut can be made to release the trapped air and the area can be resealed using adhesive.
Highlighting the Durability and Longevity of the Installed Flooring.
Vinyl sheet flooring is known for its durability and longevity, especially when installed properly and maintained well. This type of flooring is resistant to many factors that typically cause wear and tear such as stains, spills, and foot traffic.
When installed over carpet, it provides an extra layer of cushioning, further extending its lifespan. With proper care and maintenance, vinyl sheet flooring over carpet can last for many years, proving to be a cost-effective and practical flooring solution.
Conclusion
The process of installing vinyl sheet flooring over carpet opens the door to a world of design possibilities and convenience. By following these step-by-step instructions, you have successfully transformed your living space without the need for costly carpet removal.
Embrace the durability, style, and ease of maintenance that vinyl sheet flooring provides while retaining the comfort of your existing carpet foundation. This innovative approach not only saves time and money but also allows you to enjoy a refreshed and dynamic atmosphere in your home.
With the right tools and a bit of creativity, you’ve unlocked the potential to redefine your space and make a lasting impression.
So, step confidently onto your newly installed vinyl sheet flooring, knowing that you’ve achieved a seamless and stylish upgrade that harmoniously blends comfort and contemporary design.
FAQs
Can I install vinyl sheet flooring over any type of carpet?
Vinyl sheet flooring can be installed over most low-pile carpets, including Berber and commercial-grade carpets. However, it is not recommended to install over high-pile or plush carpets as they may cause unevenness and affect the overall finish of the floor.
Do I need to prep my carpet before installing vinyl sheet flooring?
Yes, it is essential to thoroughly clean and vacuum the carpet before installation. Any debris or dirt left behind can affect the adhesion of the vinyl sheet and create lumps or bumps in the flooring.
How do I maintain vinyl sheet flooring installed over the carpet?
Regular sweeping and mopping are enough to keep your vinyl sheet flooring looking clean and fresh. However, if you notice any stains or spills, make sure to clean them up promptly with a mild cleaner and water. Avoid using harsh chemicals or abrasive materials as they can damage the surface of the vinyl.


7 thoughts on “A Guide to Installing Vinyl Sheet Flooring Over Carpet”